
Don't Tell me I'm Wrong, Robin!
- Jan 13, 2022
- 3 min read
Updated: Jan 23, 2025
Building the 1/72 Scale Italeri's A-10C with a comic twist.

The Project
I’m committed to building almost exclusively Naval Aviation subjects, but I thought the A-10 was a worthy exception to that rule. This was a commission from a friend that I built in 2020, so as of now, about two years ago. Where did the time go?
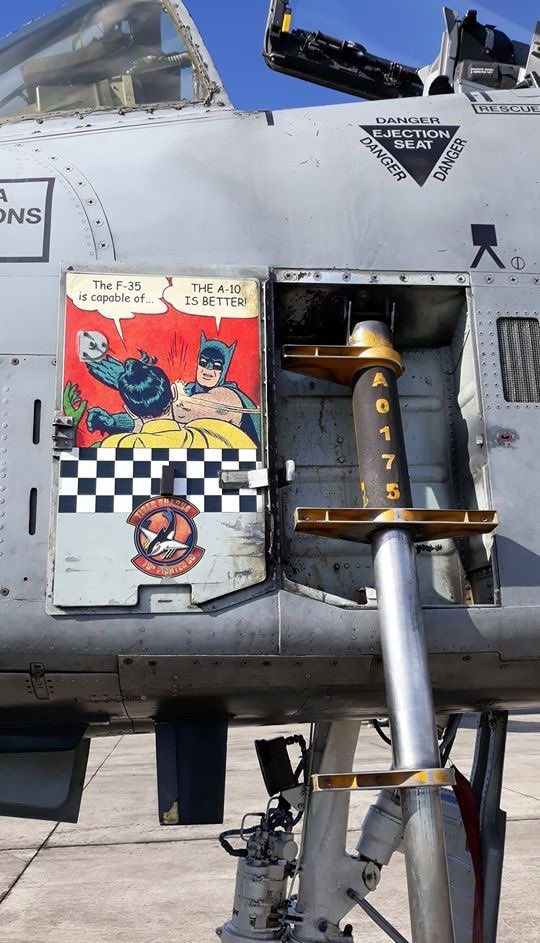
I wanted to make the one that has the Batman slapping Robin meme on the access ladder door, but I had to guess which aircraft it was. Based on the number on the ladder and after reviewing records online, I decided it was the A-10C 80-0175 from the 75th Fighter Squadron. Hope I was right!
Coincidentally, this ended up being my second award-winning model, as it got first place at the “2021 Contest Online - Aerei Ed Elicotteri” organized by Italeri. Also, coincidentally, this was the last model I was able to build without the help of reading glasses or magnifying lenses. Life catches up with us all!
The Model
The Italeri A-10C is still the best A-10 in 1/72 scale out there. It’s not perfect, but it’s actually a very nice kit with a good level of detail. I built it pretty much out of the box, except for adding some Eduard cockpit interior, an Aires seat, Res-Kit wheels, a Master Brass cannon, and Eduard ordnance.
The photos below show some of the initial stages of the build. I just added some rivets by hand to some of the panels. Everything else was just a straightforward build.


What made this model truly fun was the painting and weathering process. I began by black basing and pre-shading, then proceeded to apply two shades of gray. Specifically, I utilized MRP 038 – Light Gray FS36375 for the lighter shade and MRP 097 – U.S. Dark Ghost Grey FS36320 for the darker one. The images below depict the painting progression leading up to the application of both shades.


Once the model was painted, I moved on to use airbrush stencils to simulate stains and paint fading. I used different tones of gray, but you can get very creative with these.


After that was done, I glossed everything with Aqua Gloss and completed a wash pass with Flory Model’s Dark Dirt to put an accent on the panel lines.


After completing the washing and going over the kit once more, it was time to apply the decals. I printed the Batman Meme at home and then utilized a combination of decals from Print Scale and the kit itself. Not satisfied with the shark mouth decal from the Italeri Sheet, I opted for one from an older Academy kit that had the correct shape. It required a large amount of Micro Set to make it fit properly, but eventually, it worked out.


Following the decaling process, I applied brownish tones using an airbrush stencil, followed by a final wash using Dark Dirt and Tamiya Weathering Master. To finish, I sealed everything with a flat coat using Micro Scale Flat.


As previously stated, I utilized Eduard weaponry for the most part, with the exception of the rocket pod which I salvaged from an older model kit. Determining the appropriate payload required some effort and investigation, but I believe the end result turned out to be a well-balanced combination.

I decided to add some more bits and pieces to it before finishing it. I saw some "personalized" wheel chocks in some photos, so I decided to replicate them. I also had to make the access ladder from scratch since the one with the kit is the old ladder version with square struts. Finally, I thought that some "Remove Before Flight" tags would look nice. The photos below show the model finished before going on the display base.


To create the Display Base, I followed my typical procedure. You can find a tutorial detailing the steps I take to make them here: Simple Guide to Crafting Concrete Display Bases


And here is the model fully completed.


Working on this model was a truly enjoyable experience for me, and I could see how much joy it brought to my friend. I am grateful for the chance to create it for him, and I trust that this article will be beneficial to those interested in undertaking a similar project.
I hope you liked this one. If you have any questions, please drop me a line below. Thank you very much for reading, and as always, happy modeling!


Comments