
Say Hello to my Little Friend!
- Oct 22, 2023
- 2 min read
Updated: Jan 23, 2025
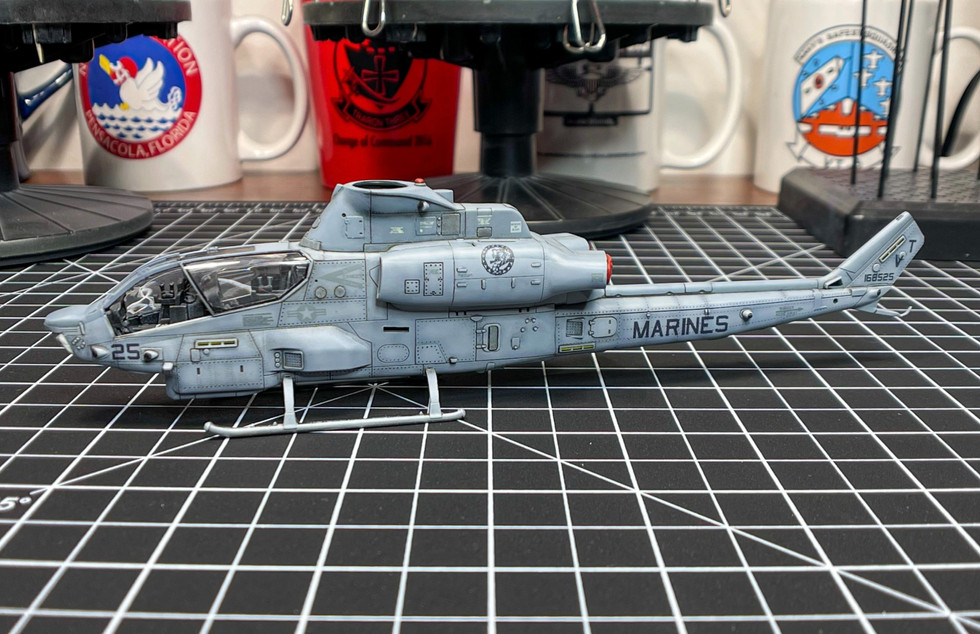
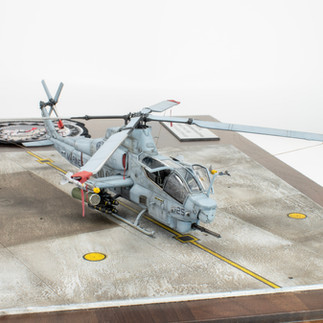
AH-1Z Viper from HMLA-367 Scarface

The Project
I built this model for a very dear Marine Aviator friend that flew this very same Viper while assigned to HMLA-367. It was commissioned by a mutual close friend, a Naval Aviator, who was his instructor during primary flight training with the VT-3.
The Model
This is the DreamModel kit in 1/72 scale. It is a lovely kit with excellent details and is complete, including some PE parts.
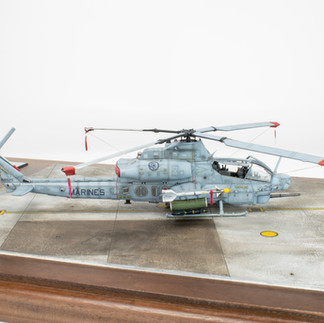
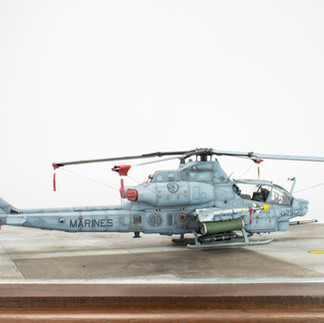
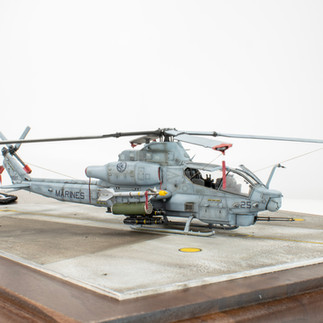
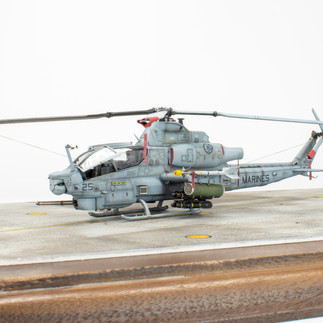
The model can be finely built straight from the box, but as usual, I decided to add some more upscale stuff, like Eduard Hellfires and Sidewinders and a Master cannon. I also opted to open the canopy, which comes in one solid piece (although it's very transparent if you want to skip that hassle), and replaced the rocket pods with pods I stole from a Special Hobby Cobra.

I started the building process with the cockpit. The cockpit and seats are well-designed and are accurate from a layout standpoint. The kit has some instrument decals, but I used some EFIS screens I grabbed from an Apache set. I also added harnesses and other bits, like cables and hoses.


I continued with the pods and missiles just to get that out of the way early. I didn't know how the exhaust seams looked from the interior, so I decided to hack that by making covers for the exhausts and intakes with Tamiya Epoxy Glue.


The painting process started as usual, with some black basing with Mr. Surfacer 1500 and some pre-shading. The model is painted with MRP 105 (US Navy Gray Blue FS 35237) for the darker upper section and MRP 038 (Light Ghost Grey FS 36375) for the lighter lower section.


I coated the model with Alclad Aqua Gloss and made some panel accents with FloryFlory's Dirt to re-coat it and apply decals. The decals are a blend of custom-made decals I ordered from Bedlam Creations and decals I took from the kit and other aftermarket sets. Bear in mind that the kit's decals, while nice, are very shiny!


Once all this was done, I sealed everything with Aqua Gloss in two coats, procuring the last one to achieve a satin finish so I could apply oils. To seal everything after that and achieve the final finish, I used a flat coat with Microscale Flat.


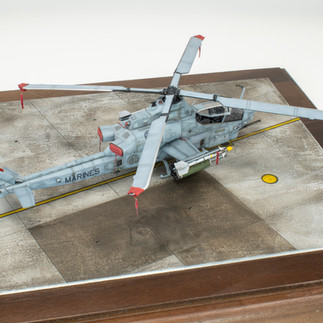
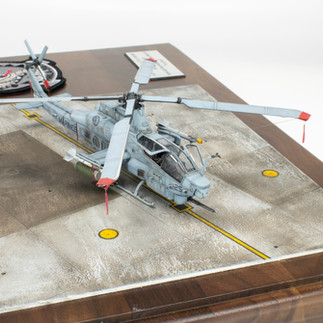
After that, it was just a matter of putting everything together and making the display base. For the base, I recreated the ramp from the U.S. Marine Corps Air Station Kaneohe Bay in Hawaii, where HMLA-367 was stationed at the time. I added tie lines and Remove Before Flight tags to recreate the photo I used as a reference. The tie-line sleeves are made with lead tape, while the lines are EZ-Line Fine. The RBF tags are from Eduard.


The following are photos of the completed model.


I hope you enjoyed this short article for this build. As always, thank you for reading, and happy modeling!


Comments